In an earlier post I explained how to use password protected zip files in Windows. This post is the Mac version. 7-Zip is still the file format, however the application is Keka instead of 7-Zip. This is because the 7-Zip application for Mac is command line only and therefore not quite as user-friendly.
Install Keka
Download Keka from https://www.keka.io or the Mac App store.
If you downloaded the file from, do the standard Mac thing and open the dmg file and drag the application to the Applications folder.
Creating a password protected file
Start by putting the files that you want to send in a folder by themselves, even if it’s only a single file. This makes it easy to keep track of what is being sent. It also helps the recipient as they will get the same folder name when they uncompress the file.
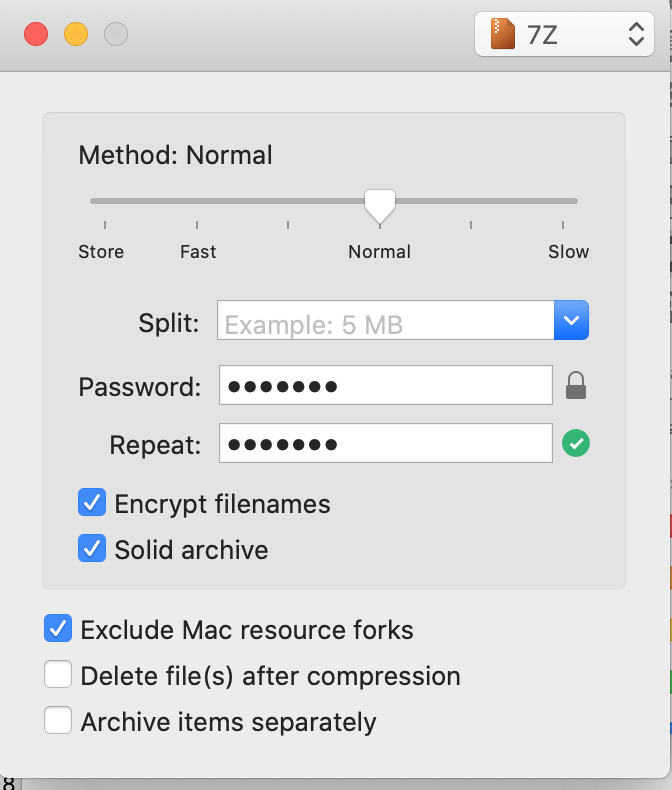
Open Keka. Specify 7Z and enter a password

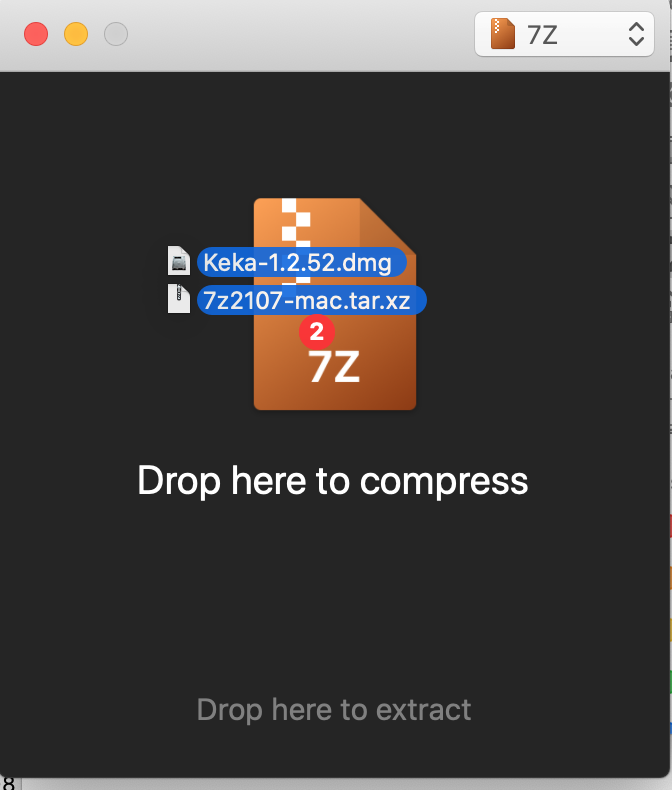
Drag and drop the folder onto the window

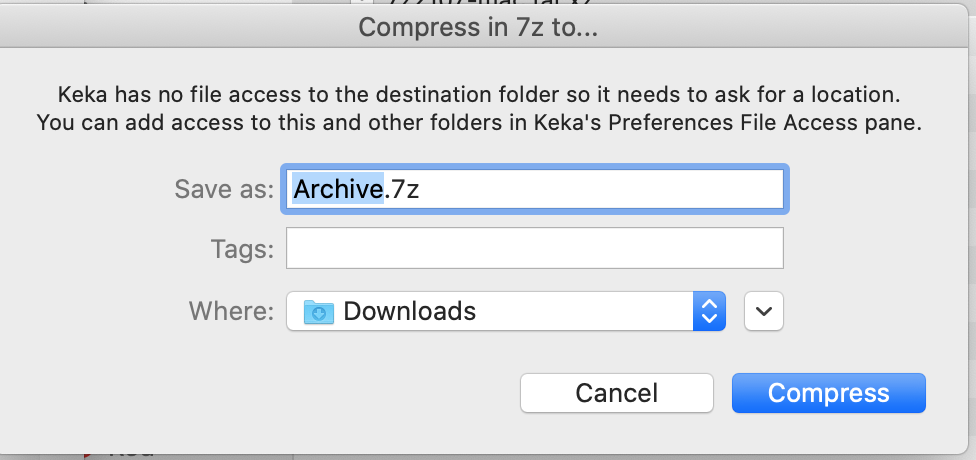
Pick filename

Click Compress
Attach this file to an email and send it with a simple message. DO NOT PUT THE PASSWORD IN THE EMAIL. Contact the recipient through another means, phone, text, encrypted chat (WhatsApp) to send the password.
Opening a password protected file
The recipient saves the file to their computer. You will need to pay attention to where the file is saved. It might be in Documents, it might be in Downloads or some other location depending on your email client.
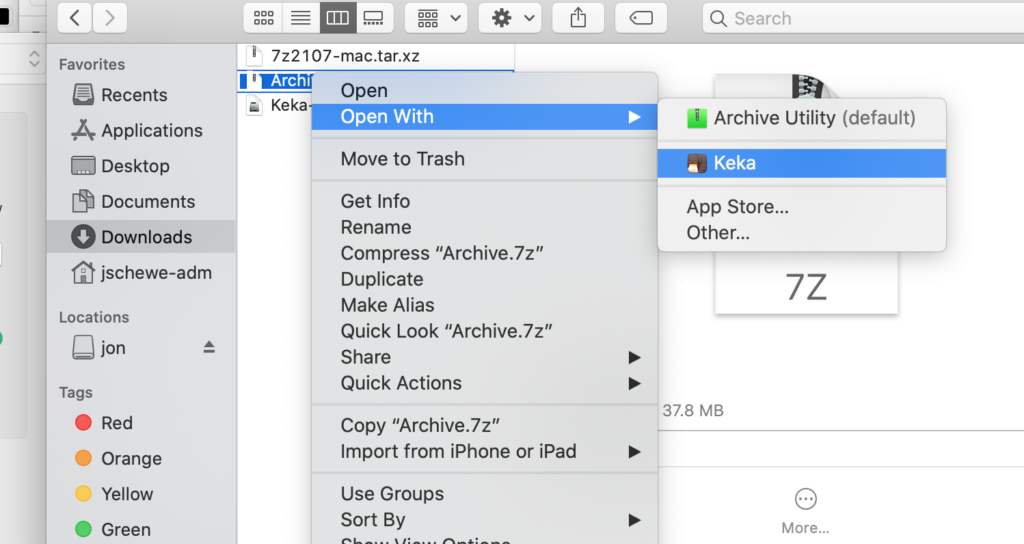
Open Finder and navigate to where the file is saved. Right click on 7z file -> Open With Keka. Don’t double click on the file to open it. This will use the built-in Mac utility that doesn’t understand the encryption on the file. You will be prompted for a password, but it’ll never work.

Pick a location. Click Extract. You will then be prompted to enter the password. When it finishes you will have a folder with the files that were sent.