I use X2Go to login to some of my systems when I need to access a graphical desktop. To keep the load on the system low I use XFCE as the desktop environment. Recently I found that when I logged into one of my systems running Ubuntu 22.04 that applications didn’t appear to want to launch. When checking top in a terminal on the remote system I found x2goagent at 100% CPU. After a couple of attempts I came across this post on the a Debian users mailing list that solved my problem.
Setting "use_compositing" to "false" in
~/.config/xfce4/xfconf/xfce-perchannel-xml/xfwm4.xml
solved the issue.
I have resisted using pull requests on GitHub for my own repositories because it seemed like I need to have have both an Issue and a Pull Request for each branch. I create Issues for fixes and features that I want to implement. During development I create a branch for the Issue and then once it’s finished and tested I manually merge with a merge commit and use the message of the merge commit to close the Issue.
Recently I came across an article about converting a GitHub Issue to a Pull Request. This solved my issue of having both an Issue and a Pull Request for each feature. I can create my Issues like normal and create a branch. Then when I push the branch I execute the following:
hub pull-request -i <issue number> -b main
This converts the specified Issue number into a Pull Request and associates it with the current branch. I need the “-b main” because I have my push.default value set to “nothing” and it appears that “hub” can’t find the main branch with that setup.
I’ve found a couple of benefits of using this pattern. One is that I can merge pull requests using the GitHub mobile app on my phone. The other is that now it’s really easy to review the changes made for a feature and keep the discussion about the issue in the same place.
In an earlier post I explained how to use password protected zip files in Windows. This post is the Mac version. 7-Zip is still the file format, however the application is Keka instead of 7-Zip. This is because the 7-Zip application for Mac is command line only and therefore not quite as user-friendly.
If you downloaded the file from, do the standard Mac thing and open the dmg file and drag the application to the Applications folder.
Creating a password protected file
Start by putting the files that you want to send in a folder by themselves, even if it’s only a single file. This makes it easy to keep track of what is being sent. It also helps the recipient as they will get the same folder name when they uncompress the file.
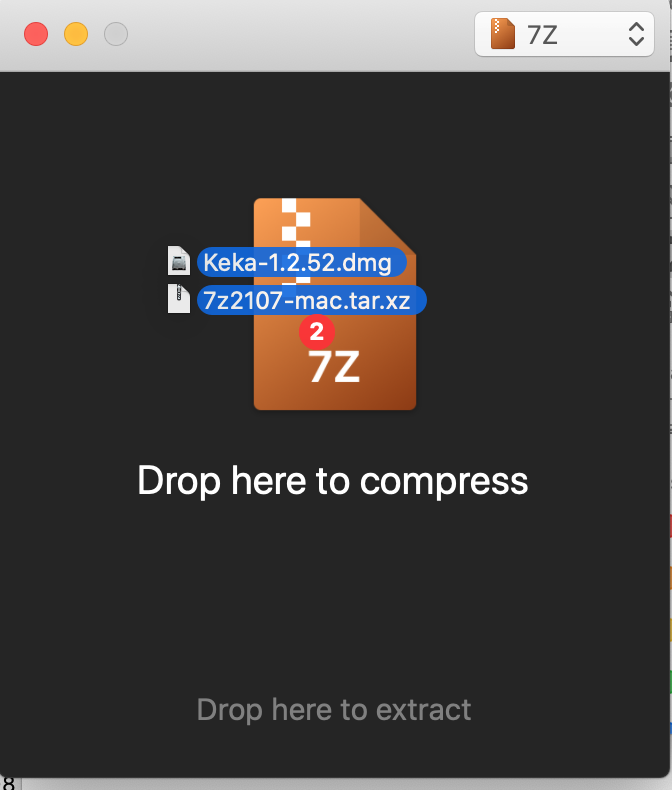
Open Keka. Specify 7Z and enter a password
Drag and drop the folder onto the window
Pick filename
Click Compress
Attach this file to an email and send it with a simple message. DO NOT PUT THE PASSWORD IN THE EMAIL. Contact the recipient through another means, phone, text, encrypted chat (WhatsApp) to send the password.
Opening a password protected file
The recipient saves the file to their computer. You will need to pay attention to where the file is saved. It might be in Documents, it might be in Downloads or some other location depending on your email client.
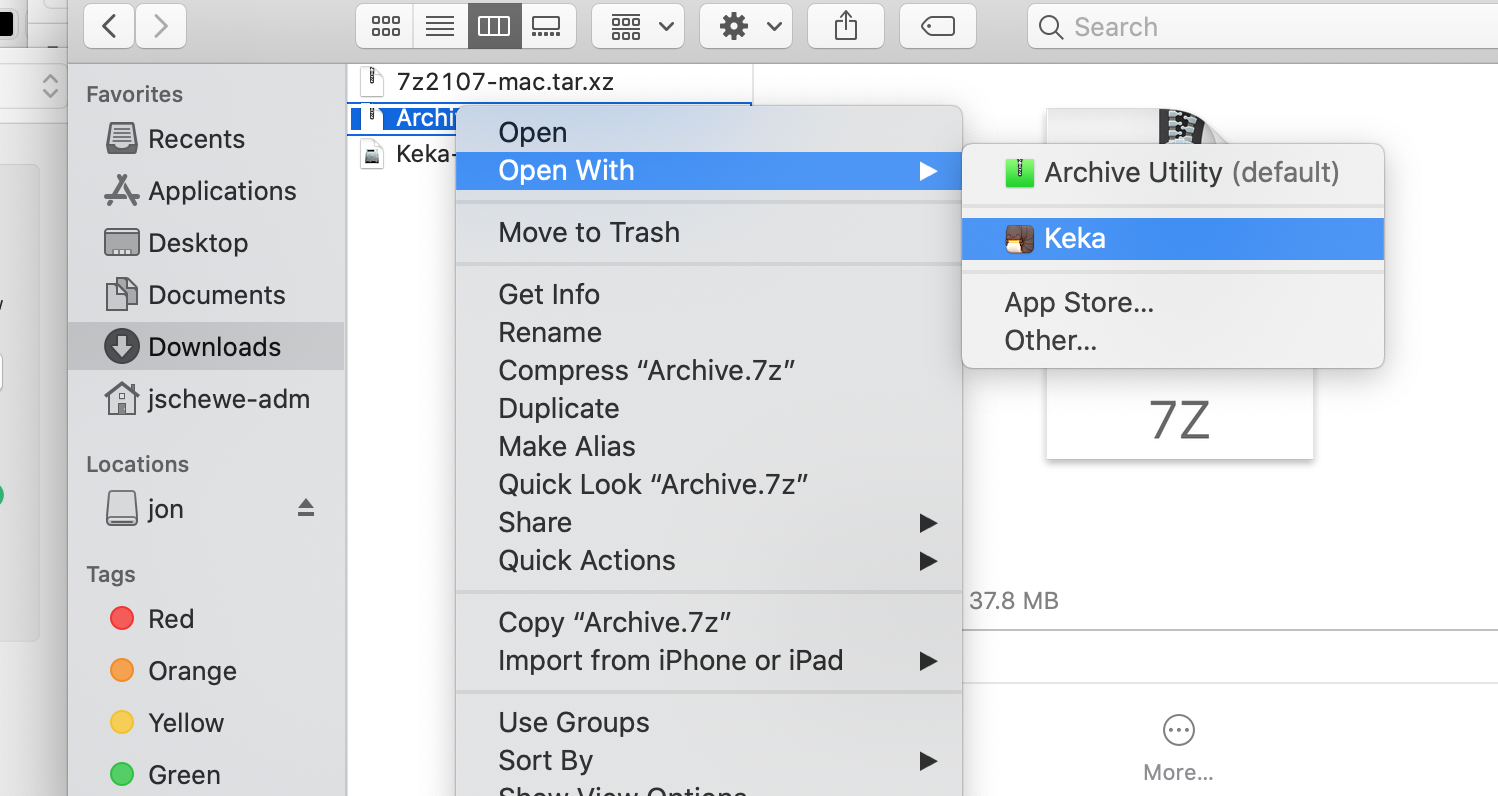
Open Finder and navigate to where the file is saved. Right click on 7z file -> Open With Keka. Don’t double click on the file to open it. This will use the built-in Mac utility that doesn’t understand the encryption on the file. You will be prompted for a password, but it’ll never work.
Pick a location. Click Extract. You will then be prompted to enter the password. When it finishes you will have a folder with the files that were sent.
Creating zip files with a password is a fairly easy way to add some security to information that you are sending via email. It’s not really good encryption, but it will keep many people out.
I suggest using 7-Zip. It’s an open-source and free application that runs on Windows, Linux and Mac. 7-zip has some better password encryption options than the zip programs built into some operating systems. This does mean that both the sender and recipient need to install 7-Zip, but I think it’s worth it.
Do this on both the sending computer and the recipient computer.
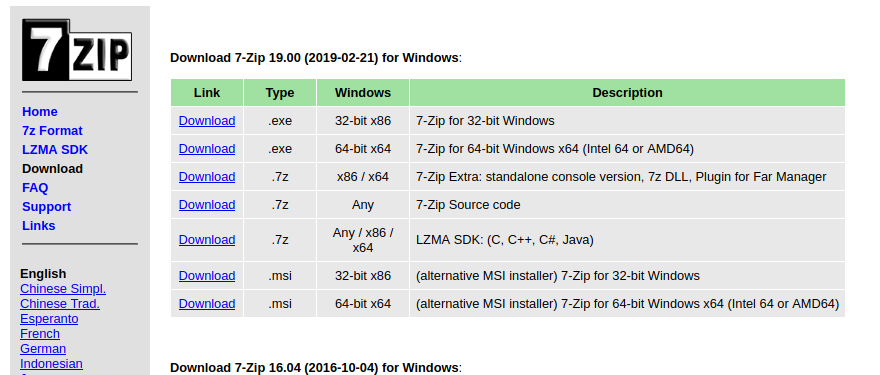
Download 7-Zip for your computer from their download page.
The first table on the page is the most recent stable version. Pick the 64-bit exe. In this screen shot it is the second row. This should work for most anyone these days. Pay attention to where the file is saved, it is probably in Downloads.
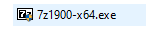
Open File Explorer and navigate to the downloaded file. Double click on the file to start the install. The file will be named 7z1900-64.exe, where the 1900 may be different. There will be a black and white icon next to it.
During the install, the defaults are all fine. You may need to enter an administrator password for the install to finish.
Creating a password protected file
Start by putting the files that you want to send in a folder by themselves, even if it’s only a single file. This makes it easy to keep track of what is being sent. It also helps the recipient as they will get the same folder name when they uncompress the file.
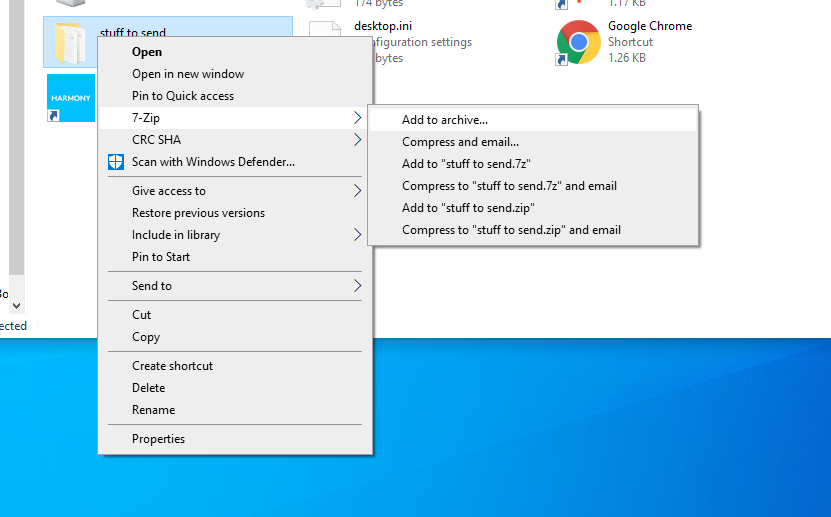
Open Windows Explorer and navigate to the folder that you want to send. Now right click on the folder that you put all of your files in. Then click on 7-Zip and then Add to archive… If the 7-Zip option isn’t in the right-click menu, it is likely the case that you installed the 32-bit version rather than the 64-bit version. Uninstall 7-Zip and then go back to the download page and make sure you get the 64-bit version.
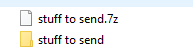
In the archive window there is a section in the lower right to enter a password. You need to enter it twice to be sure it was typed correctly. Leave everything else at the defaults. This will use AES-256 encryption, lower right corner, to encrypt the file. The format will be 7-Zip, so the recipient needs 7-Zip to open it. Then click OK. This will create a file with the name that you specified with a 7z extension next to the folder. If you have extensions turned off you may just see the name of the file. In the image below the file to send is the one with the paper icon named “stuff to send.7z”. This was created from the yellow folder “stuff to send”.
Attach this file to an email and send it with a simple message. DO NOT PUT THE PASSWORD IN THE EMAIL. Contact the recipient through another means, phone, text, encrypted chat (WhatsApp) to send the password.
Opening a password protected file
The recipient saves the file to their computer. You will need to pay attention to where the file is saved. It might be in Documents, it might be in Downloads or some other location depending on your email client.
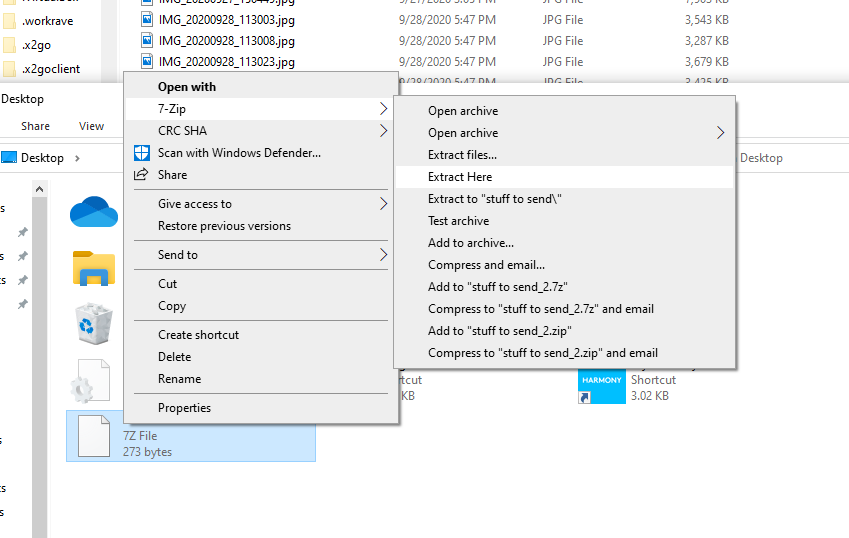
Open File Explorer and navigate to the downloaded file. Then right click on the file and select 7-Zip, then Extract Here… You will then be prompted for the password. When it finishes you will have a folder with the files that were sent.
The Duplicati backup software is a nice cross platform backup solution. There are times when one wants to start a new backup with the same settings as another backup. Duplicati doesn’t support 2 backups going to the same directory, so one needs to make sure to specify a new destination for the new backup.
Export the backup
Click on the backup
Click Export
Click Export button (accept message about passwords)
Save file to somewhere on your computer
Disable scheduled backups of this job for now
Click on the backup
Click Edit
Click Schedule
Uncheck Automatically run backups
Click Options
Save
Create a new backup from the old configuration
Click on Add backup
Import from file
Select the file on your computer
Import file
Change the name from “backup name” to “{backup name} {today’s date}”
Click on Destination
Change the end of the Path on server to be the current date (this makes sure that we start in a new directory)
Test connection
OK to create
Schedule
Make sure there is a schedule set
Options
Save
Delete the exported backup file from your computer so that the password isn’t left around for someone to find
Start the backup
Cleanup of old backups
Once you are certain that the backup is working you should clean up the old backup from the destination to save space. Here are instructions for doing this when the backup destination is Nextcloud.
Delete the backup from the server
Click on the backup you want to delete
Click Edit
Click on 2 Destination
The Storage type will be WebDAV – if not, this won’t work
Pay attention to the Server and port and the SSL checkbox.
In “Path on server” everything before “/remote.php” is the path
Put the following in the address bar of your web browser https://{host}:{port}/{path}.
Use “http” instead of “https” if “SSL” is not checked.
Login with the username and password that is configured in the backup.
Check the box next to the directory from the OLD backup.
Click the 3 dots next to Actions
Click delete
Wait for it to finish
Use the gear in the top right to log out
Alternatively I have also found that one can click the checkbox in Duplicati to delete the files from the server when deleting the configuration (see below) and that will remove the files from the server in most cases.
Delete the backup configuration
Click on the backup you want to delete
Click Delete
Click Delete backup (leave delete remote files unchecked, this was done above)
I have been setting up a few Jenkins nodes lately and decided that I should write up the configuration that I’m using to share with others.
Create the node in Jenkins
The first thing to do is to create the node in Jenkins. Start by logging into your Jenkins host, then visit the “Manage Jenkins” link. Once there, visit “Manage Nodes” and then click “New Node” on the left.
Give your node a name. It’s a good idea to avoid spaces and special characters. I use letters, numbers, underscores and hyphens. Select “Permanent Agent” and then “OK”.
Here you need to specify the working directory, labels and the usage. I usually set the usage to only build jobs with a matching label expression. This is useful when setting up nodes per job to make sure that the node doesn’t get used for other random jobs. You may also want to specify an email address to notify when the node goes online and/or offline.
Once you have saved the configuration you will see a page specifying that the agent is offline and how to launch it. The important piece of information here is the secret. This will be a very long string of letters and numbers.
Linux Setup
First create a user in Linux that the node will run as. This user should not have any special privileges.
sudo adduser JENKINS_BUILD_USER
Replace “JENKINS_BUILD_USER” with the username that you are using. By default this user has a locked password so no one can login as this user.
In “/home/JENKINS_BUILD_USER” create the file “start-jenkins-node.sh” to start the node
#!/bin/sh

debug() { ! "${log_debug-false}" || log "DEBUG: $*" >&2; }
log() { printf '%s\n' "$*"; }
warn() { log "WARNING: $*" >&2; }
error() { log "ERROR: $*" >&2; }
fatal() { error "$*"; exit 1; }
try() { "$@" || fatal "'$@' failed"; }

mydir=$(cd "$(dirname "$0")" && pwd -L) || fatal "Unable to determine script directory"

jenkins_host=JENKINS_HOST
jenkins_node_name=NODE_NAME
jenkins_node_secret=SECRET

cd "${mydir}"
# --no-check-certificate is needed if the certificate store does not recognize the jenkins host certificate
try wget https://${jenkins_host}/jnlpJars/agent.jar -O agent.jar

# -noCertificateCheck is needed if the certificate isn't recognized
nohup java -jar agent.jar -jnlpUrl https://${jenkins_host}/computer/${jenkins_node_name}/slave-agent.jnlp -secret ${jenkins_node_secret} -workDir "${HOME}" > "${HOME}"/jenkins-node.log 2>&1
Replace JENKINS_HOST with the hostname that Jenkins is running on. This script assumes that Jenkins is running at hte root of your server. If that’s not the case you’ll want to append the base path to the end of JENKINS_HOST. Replace NODE_NAME with the name of the node and SECRET with the secret from the node configuration on the Jenkins host.
This past week I finally decided to try out Google Inbox. The feature that really drew me to it was the ability to snooze emails. This feature allows you to make an email leave your inbox and come back at some later date and time. This is a really cool feature and a nice way to delay dealing with an email until you need to. In addition to this it is really easy to create filters that add emails to bundles (labels). These bundles can be set to appear in the inbox or not and you have some control over when the bundles appear in the inbox. When a bundle appears in the inbox it shows up as a wide message, once opened you see all of the messages in the bundle. This is a nice way to be able to group messages; you can see your labels in the inbox in a compact fashion. You can also decide which bundles will trigger notifications in the android app.
After using Inbox for about a week, I’ve decided to go back to using GMail. Here are my reasons:
The keyboard shortcuts in the web interface are lacking.
No keyboard shortcut to goto a label/bundle
No keyboard shortcut to type in the name of a bundle to move to. There is a shortcut ‘.’ to open the move to menu though.
The bar on the left side showing the bundles don’t show how many unread messages are in the bundle
When you choose to have bundles show up in the inbox you can select as the messages arrive, once a day (7:00) and once a week (Monday 7:00). I would really like to be able to at least pick the time for once a day and once a week. It would be nice to be able to pick the day on the once a week.
I like to make sure all messages that I keep are assigned at least one label. The Inbox interface doesn’t allow me to see what labels have been applied to a message. This makes me very concerned that I will loose messages by them being archived and not assigned any labels. GMail’s search interface is great, but I really like to be able to find my messages by label.
If Google fixes these features I will give Inbox a try again, until then I’m sticking with GMail.
I usually try and upgrade my computers fairly quickly once a new operating system or a new version of an application comes out, even if there aren’t particularly new features that I’m looking for. However sometimes I’ve been a little slow to upgrade some servers because I’m too busy with other stuff or it’s too hard to schedule downtime. I was reminded this week why it’s a good idea to do upgrades sooner rather than later.
I had some computers that I had gotten behind on upgrading the operating system by about 1 year. The security patches were applied, but there was a newer version of the OS and I just didn’t have the time to take care of it. Well, since then I moved out of that job, but still depended on the server. Since then it’s up to someone else to upgrade this system and they’re much like me, very busy with other things. So time goes on and now this server is 3 years behind on the OS upgrade and there are some major changes in the OS.
Now it’s time to replace the hardware of the machine. Since it’s a Linux machine the standard answer is just move the drives and keep going. I suspected there might be problems, so I left my number with my replacement. He started the replacement and well, it didn’t go smoothly. As it turns out the new hardware wasn’t quite supported by the older OS, such that the system would partially boot, but not completely. So we ended up doing a full upgrade across 3 minor and 1 major versions of the OS and then fixing up all of the little things that broke along the way.
In the end this probably took longer than it would have to do along the way because the system configuration would have been fresher in our minds. Plus the changes wouldn’t have been so drastic and things would likely have migrated much easier.
So remember to make time to upgrade your systems right away.